

I am happy to be joining the Crochet Charity Drive hosted by Sonya of Blackstone Designs again. Every season a group of designers get together and design patterns that they post for free on their blogs whether it be a forever free pattern or free for the entire season that that particular charity drive is active. The hopes of having them free is that people will use these patterns and then donate the finished items to a charity of their choosing. The theme this time was “Toys.”
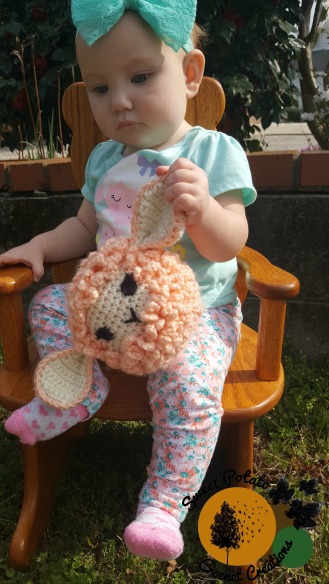
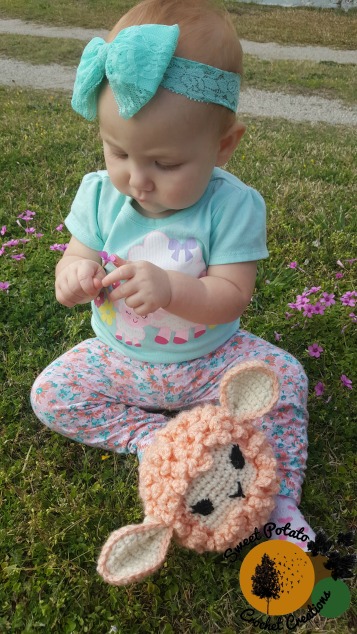
The type of toy that I chose to make is a sensory toy for babies/young children. Babies are always learning and exploring. Having a 9 month old at home, we have tons of toys for her to play with, but her favorites are the ones that make noise and ones that she can grab and pick up easily. Thinking of her, I thought a sensory ball would be perfect!
Since it is getting close to Easter, I chose to make a cute little sheep. To make the sheep ball noisy and fun I added a cat ball in the center of it and utilized a used (but clean) cereal bag to make the sheep’s ears make that wonderful crinkle sound that babies love. The stitches used on the body of the sheep make it super squishy to the touch and very easy for a baby to pick up to play with.
Favorite or save this to your Ravelry Library!
Sheep Sensory Ball
Materials Needed:
- 75 yards of worsted weight yarn #4
- Main color
- Face and ear color
- Small amount of black for eyes and nose
- G hook
- Measuring tape
- Yarn needle
- Stitch marker
- Scissors
- Empty Cereal Bag
- Cat Ball with bell inside
- Polyfil stuffing
Gauge: Not completely necessary for this project but to keep your stitches tight enough, your project should measure 2 inches after Round 7. Be sure to measure the circle on the back of the work, not the front with the loops.
Notes:
- Pattern is worked in continuous rounds. Use a stitch marker to keep track of rounds if necessary.
- Face portion of sheep (minus round 13) will always be worked into BOTH loops.
- If using a cereal bag for the crinkle ears, make sure your bag is CLEAN.
- If using a cat ball, it should be added in after some polyfil is already in the bottom of the ball and then surrounded with more polyfil.
Stitch Glossary: ch- chain, st- stitch, sc- single crochet, fsc- foundation single crochet, sc dec- single crochet decrease, inv sc dec- invisible single crochet decrease, FLO- front loop only, BLO- back loop only, MC- magic circle, CA- color A, CB- color B
Special Stitches:
Invisible sc dec- insert hook under front loop of next stitch. Insert hook under front loop of the stitch after that. Yarn over, pull through 2 loops. Yarn over, pull through the last 2 loops.
Pattern instructions:
Round 1: With CA, 6 sc in MC. (6)
Round 2: 2 sc in each st around. (12)
Round 3: In FLO, *ch 6. Sc in the next st.* Repeat around. (11 loops, 12 sc)
Round 4: In remaining back loops of previous round worked into, *2 sc in the next st. Sc in the next st* Repeat around. (18)
Round 5: *2 sc in the next st. Sc in the next 2 st.* Repeat around. (24)
Round 6: Repeat Round 3. (23 loops, 24 sc)
Round 7: In remaining back loops of previous round worked into, *2 sc in the next st. Sc in the next 3 st.* Repeat around. (30)
Round 8: *2 sc in the next st. Sc in the next 4 st.* Repeat around. (36)
Round 9: Repeat Round 3. (35 loops, 36 sc)
Round 10: In remaining back loops of previous round worked into, *2 sc in the next st. Sc in the next 5 st.* Repeat around. (42)
Round 11: *2 sc in the next st. Sc in the next 6 st.* Repeat around. (48)
Round 12: Repeat Round 3. (47 loops, 48 sc)
Round 13: In remaining back loops of previous round worked into, sc in the next 18 st. With CB, sc in the next 12 st. With CA, sc in the next 18 st. (48)
Round 14: With CA, sc in the next 18 st. With CB, sc in the next 12 st. With CA, sc in the next 18 st. (48)
Round 15: In FLO, [(ch 6. Sc in the next st.) x18] With CB, sc through BOTH loops of the next 12 st. With CA, [(ch 6. Sc in the next st) x18] (36 loops, 48 sc)
Round 16: In remaining back loops of previous round worked into, sc in the next 18 st. With CB, sc through BOTH loops of the next 12 st. With CA, sc in remaining back loops of previous round worked into in the next 18 st. (48)
Round 17-19: Repeat Rounds 14-16.
Round 20: Repeat Round 14.
Round 21: Repeat Round 15.
Round 22: In remaining back loops of previous round worked into, *inv sc dec over the next 2 st. Sc in the next 6 st.* Repeat around. (42)
Round 23: *Inv sc dec over the next 2 st. Sc in the 5 st.* Repeat around. (36)
Note: If you haven’t already, begin to stuff now and continue to stuff as the ball is decreased. If using a cat ball, make sure to add that before the hole gets too small to do so.
Round 24: Repeat Round 3. (35 loops, 36 sc)
Round 25: In remaining back loops of previous round worked into, *inv sc dec over the next 2 st. Sc in the next 4 st.* Repeat around. (30)
Round 26: *Inv sc dec over the next 2 st. Sc in the next 3 st.* Repeat around. (24)
Round 27: Repeat Round 3. (23 loops, 24 sc)
Round 28: In remaining back loops of previous round worked into, *inv sc dec over the next 2 st. Sc in the next 2 st.* Repeat around. (18)
Round 29: *Inv sc dec over the next 2 st. Sc in the next st.* Repeat around. (12)
Round 30: Repeat Round 3. (11 loops, 12 sc)
Round 31: In remaining back loops of previous round worked into, inv sc dec around. (6). Fasten off leaving a tail to close the hole.
Eyes
Make 2
Round 1: With black yarn or whatever color chosen for eye color, 4 sc in MC. Join to the first st. Fasten off leaving a tail to sew on.
Ears
Make 4
Row 1: With CB, Fsc 6. Ch 1. Turn. (6)
Row 2-4: Sc in each st across. Ch 1. Turn. (6)
Row 5: 2 sc in the same st as the ch 1. Sc in the next 4 st. 2 sc in the last st. Ch 1. Turn. (8)
Row 6: 2 sc in the same st as the ch 1. Sc in the next 6 st. 2 sc in the last st. Ch 1. Turn. (10)
Row 7-8: Sc in each st across. Ch 1. Turn. (10)
Row 9: Sc dec over the next 2 st. Sc in the next
6 st. Sc dec over the last 2 st. Ch 1. Turn. (8)
Row 10: Sc dec over the first 2 st. Sc in the next 4 st. Sc dec over the last 2 st. Ch 1. Turn. (6)
Row 11: Sc dec over the first 2 st. Sc in the next 2 st. Sc dec over the last 2 st. (4) Fasten off.
Making the Crinkle Pieces:
If wanting the ears to be crinkly, lay out your clean cereal bag. Place one ear piece flat on top of the cereal bag. Using a marker or pen that will mark on the bag, trace around the ear piece. Cut out the traced shape inside the lines you marked, making sure to cut through both layers of the bag so that you have 2 pieces. Cut off the skinnier ends of the pieces. You should now have 2 pieces that will fit into the larger rounded area of the ears once the pieces are put together. Note: you may have to trim your pieces of cereal bag to make them fit better.
Putting Ears Together:
Take 2 ears pieces and put them together. With CA, sc evenly through both layers around. If wanting crinkle ears, make sure to put one piece of cereal bag that you previously cut in between the 2 pieces of ear before you fully sc around them. Join to the first sc. Fasten off leaving a long tail. Pinch the skinnier end (end with the 6 sc) of your now finished ear together. With the tail left from sc around the 2 ear pieces, sew the pinched piece together a few times to keep it in that shape.
Finishing:
-With the tail of the ears, sew your ears onto the sheep ball, even with rounds 19 and 20. These rows should be between rows of loops and should be even with the top 2 rows of your face color, Sew your ears 3 stitches away from this face section.
-Sew eyes onto face portion. Placement is your choice. You can opt for embroidering eyes on if desired.
-With black yarn, embroider a nose on your ball in the lower middle of the face section.
-Weave in all remaining ends.
***My testers and I have worked diligently to make this pattern for you. Rewriting, reselling, distributing, or copying this pattern as your own and/or without my consent is prohibited. You may sell any finished items from this pattern. However, I do ask that you credit me as the designer and link back to my Facebook page or my Ravelry page.
I hope you enjoy this free pattern!!


Love this! My son would adore it ❤️
LikeLike